Step 5 – Define attributes/characteristics
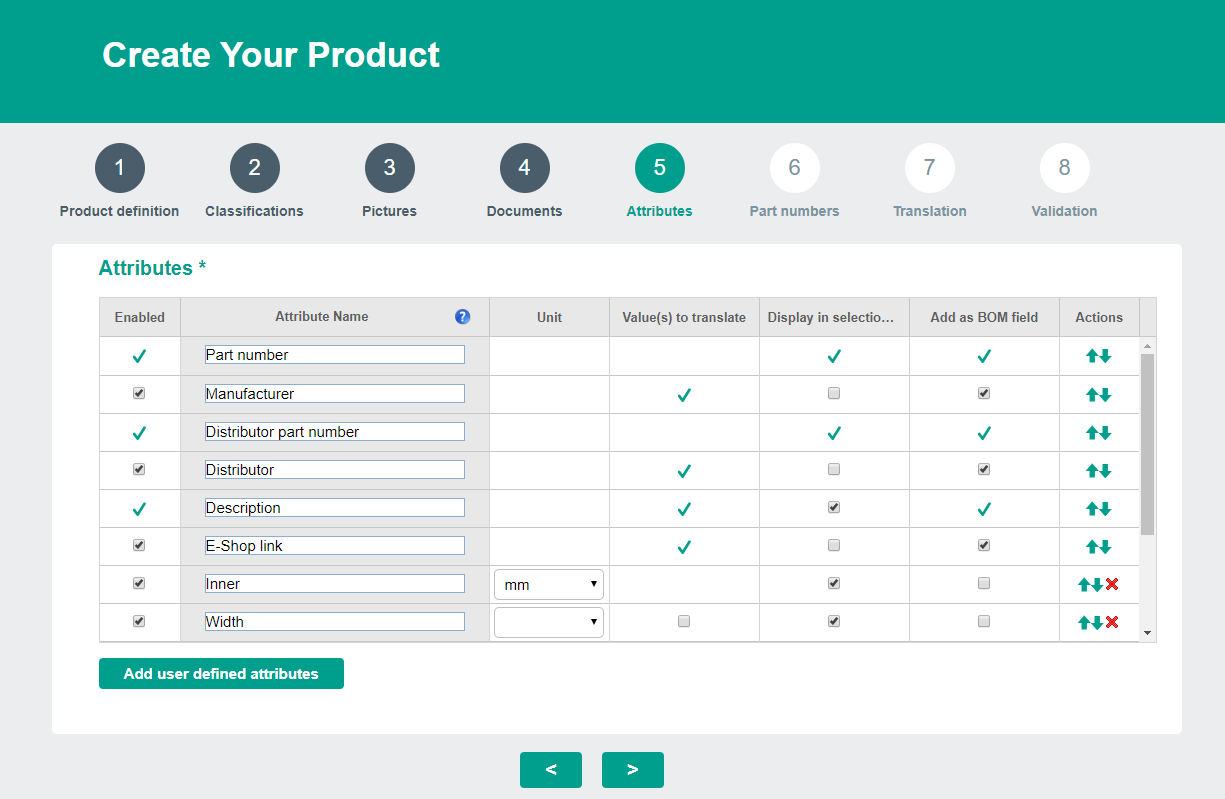
Once the table header has been configured, the next step is to complete the rows. The list of fields in this table may vary depending on the chosen classification (in Step 2).
- To add a new product attribute, click the “Add user defined attributes” button, below the table, or click inside an empty cell to add a row automatically.
- You can decide whether or not to display an attribute by selecting or deselecting the box in the “Display” column. Some specific attributes are obligatory and cannot be deselected.
- It is good practice to add a unit of measurement for all attributes that define a physical quantity.
- When the attribute is a text, check “Value(s) to translate” checkbox if it needs to be translated in the language(s) available for the product,
- To move a row, click the “up” and “down” arrows in the “Actions” column or relocate it using your mouse.
- To delete a row, click the red cross in the “Actions” column.

Can I modify the names of the attributes defined by default?
You can modify the labels of the default attributes in order to adapt them to your own vocabulary while keeping the original meaning of the attribute.
For example, you might want to rename the attribute “part number” to “article number” if that is how you refer to your product when dealing with your customers.
Documents > Attributes > Part numbers


 Deutsch
 Français
 Italiano
 Español
 Português
 中文 (中国)
 日本語
日本語 Русский